How to create a Claude skill
Create a Claude skill from scratch: write SKILL.md with a name and description, add scripts and references, test it in Claude Code, make it work in Codex and Cursor, and share it on GitHub, as a plugin or on SkillGild.
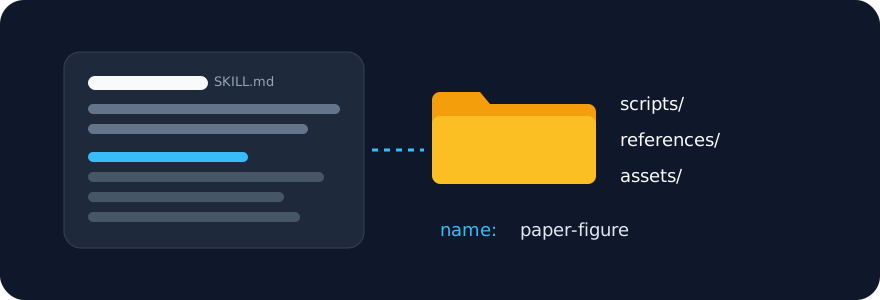
A Claude skill is a folder with a SKILL.md file. The file tells Claude when the skill applies and how to do the job; optional scripts, references and templates sit beside it. This guide builds one from scratch, tests it in Claude Code, and shows how to share it. It takes about twenty minutes the first time.
The same folder format is the open Agent Skills standard, so a skill you write for Claude Code also loads in Codex, Cursor and Gemini CLI.
Try it on a real task: Academic Plotting is free for 25 runs a month.
#What a skill is, in one minute
Claude reads every installed skill's name and description at startup. When a request matches a description, it loads that skill's full instructions and follows them. Nothing else is loaded until it is needed, which is why a skill can carry long reference material without crowding the context window.
A skill is the right tool when the same kind of job keeps coming up and you want it done the same good way every time: a release checklist, a chart style, a review rubric, a document format. For a one-off instruction, a plain prompt is enough. For project-wide rules that always apply, use CLAUDE.md. For a connection to an external system, use an MCP server.
#Step 1: pick a job with a clear trigger
Write one sentence that says what the skill does and when it should fire. If you cannot finish the sentence, the skill is too broad.
Good: "Produce a publication-quality matplotlib figure from a CSV, with axes, units and a size that survives a two-column layout."
Too broad: "Help with data."
The trigger matters more than the method. Claude decides whether to load a skill from the description alone, so phrases a user would naturally say ("make a chart", "plot this", "figure for the paper") belong in it.
#Step 2: create the folder
Personal skills live in your home directory and apply to every project. Project skills live in the repository and ship with it.
# Personal: available in every project
mkdir -p ~/.claude/skills/paper-figure

# Project: committed with the repository
mkdir -p .claude/skills/paper-figure
The folder name becomes the skill name. Use lowercase letters, digits and hyphens, under 64 characters.
#Step 3: write SKILL.md
SKILL.md starts with YAML frontmatter, then Markdown instructions.
---
name: paper-figure
description: Create publication-quality matplotlib figures from CSV or DataFrame data. Use when the user asks for a chart, plot or figure for a paper, report or slide, or mentions axes, units, journal style or column width.
---

# Paper figure

Produce a figure that reads correctly at its final printed size.

## Steps

1. Ask for, or infer, the final width: single column (3.5 in) or double column (7 in).
2. Load the data with pandas. Never fabricate values; if a column is missing, stop and say so.
3. Build the figure with matplotlib using the style in `references/style.md`.
4. Label every axis with quantity and unit. Use a legend only when there is more than one series.
5. Save as SVG and PNG at 300 dpi, named after the quantity plotted.
6. Run `scripts/check_figure.py <file>` and fix anything it reports.

## Rules

- Colour-blind-safe palette only (see `references/style.md`).
- Font size never below 7 pt at final size.
- No chart junk: no gridlines heavier than the data, no 3D, no background fills.
The two fields that matter:
- name: must match the folder name.
- description: the only thing Claude sees before deciding to load the skill. Say what it does and when to use it, in the words a user would say. Keep it under about 1,000 characters.
Claude Code also understands optional fields such as allowed-tools (restrict which tools the skill may use) and disable-model-invocation: true (the skill only runs when a user asks for it by name, which suits anything with side effects such as deploys). Check the Claude Code documentation for the current list.
#Step 4: add supporting files
Keep SKILL.md short and put detail in files Claude loads only when it needs them.
paper-figure/
├── SKILL.md
├── references/
│   └── style.md          # palette, fonts, sizes, examples
├── scripts/
│   └── check_figure.py   # validates the output
└── assets/
    └── template.py       # a starting script Claude can copy
A script is the most reliable part of a skill. Instructions can be interpreted; a script that checks font sizes and reports failures is not. If your skill produces a file, give it a checker.
Reference the files by relative path from SKILL.md, as in the example above. Claude reads them from the skill folder.
#Step 5: test it
Start a new Claude Code session in a project with some data and ask in natural language, without naming the skill:
Make a figure of accuracy against epoch from results.csv for a two-column paper.Claude should announce that it is using the skill, or you will see the skill's steps in its behaviour. In recent versions you can also invoke a skill directly by typing /paper-figure.
If it does not load:
- The description does not match the request. Add the words you actually used.
- The folder is in the wrong place. Check
~/.claude/skills/<name>/SKILL.mdor.claude/skills/<name>/SKILL.md. - The frontmatter is invalid. The
---lines must be the first thing in the file, withname:anddescription:between them. - The session started before the file existed. Start a new session.
The SKILL.md checker catches the frontmatter problems in one paste, and its AI review scores whether the description will trigger the skill.
Then test the failure modes: a CSV with a missing column, an unreadable file, a request for a chart type the skill does not cover. A good skill says what it cannot do instead of guessing.
#Step 6: make it reusable by other agents
Nothing in the format above is specific to Claude. To use the same skill elsewhere, copy the folder to that client's skills directory:
| Client | Project folder | Personal folder |
|---|---|---|
| Claude Code | .claude/skills/ |
~/.claude/skills/ |
| Codex | .agents/skills/ |
~/.agents/skills/ |
| Cursor | .cursor/skills/ |
~/.cursor/skills/ |
| Gemini CLI | .gemini/skills/ |
~/.gemini/skills/ |
Avoid Claude-only frontmatter fields if portability matters, or accept that other clients ignore them.
#Step 7: share it
Three ways, from simplest to most polished:
- A GitHub repository. Put the skill folder (or a
skills/directory of several) in a public repository with a license file. Anyone can then install it with the SkillGild CLI:skillgild install <slug>clones the repository and copies the folder into the right place. Listing it on SkillGild adds a page people can find by searching the skill's name. - A plugin. Wrap one or more skills, with optional commands, agents and MCP servers, in a Claude Code plugin so people install it with
/plugin install. - A hosted SkillGild skill. When the method includes something you do not want to ship, such as a private prompt, a licensed dataset or a server-side validator, publish it as a hosted skill: your agent follows a public guide and calls server tools that stay on SkillGild. The creator documentation covers the format and review.
#A checklist before you publish
- The description names the task and the trigger words.
SKILL.mdis under about 500 lines; detail lives inreferences/.- Every file the instructions mention exists.
- A fresh session loads the skill from a natural request.
- Scripts have no hard-coded paths and run from any working directory.
- The repository has a license file. Without one, nobody can legally reuse your work.
- The README says what the skill needs: API keys, binaries, Python packages.
#Skills that generate skills
Anthropic publishes a Skill Creator skill that scaffolds a correct SKILL.md, asks the questions above and runs an evaluation loop over your examples. It is a fast way to get a first draft; the testing step is still yours.
For a comparison of skills with the other ways to extend Claude Code, read skills vs agents, commands and plugins. For installation details and troubleshooting, read how to install Claude Code skills.
Frequently asked questions
What is a Claude skill?
A folder with a SKILL.md file: YAML frontmatter with a name and a description, then instructions, plus optional scripts, references and assets. Claude loads it when a request matches the description.
Where do I put a Claude skill?
In ~/.claude/skills/<name>/ for a personal skill available in every project, or in .claude/skills/<name>/ inside a repository for a project skill. The folder name is the skill name.
How does Claude decide when to use a skill?
From the description alone. Claude reads every installed skill's name and description at startup and loads the full instructions only when a request matches, so the description must say what the skill does and when, in the words a user would type.
Can I use a Claude skill in Codex or Cursor?
Yes. The folder format is the open Agent Skills standard. Copy the folder to .agents/skills/ for Codex, .cursor/skills/ for Cursor or .gemini/skills/ for Gemini CLI; Claude-only frontmatter fields are ignored there.
How do I share a skill?
Put it in a public GitHub repository with a license file so people can install it with skillgild install, wrap it in a Claude Code plugin for /plugin install, or publish it as a hosted SkillGild skill when part of the method must stay private.